Google SAML Configuration Guide
Step 1: Access Google AdminCopied!
-
Log in to your Google Admin account
-
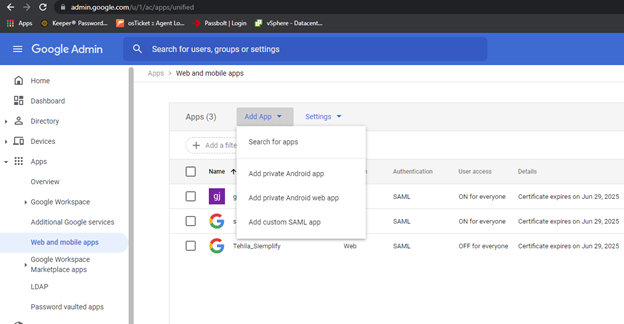
Click "Apps" in the left sidebar
-
Select "Web and mobile apps"
-
Hit "Add app" and choose "Add custom SAML app

Step 2: Name Your SAML AppCopied!
-
Enter the app name
-
Click continue
Step 3: Set Up IdP DetailsCopied!
-
Copy and paste "SSO URL and Entity ID" and "Certificate" into the form
Step 4: Enter ACS URL and Entity IDCopied!
-
Input the provided values
-
Press continue
Step 5: Map AttributesCopied!
-
Map "Primary email" to "email"
-
Click Finish
Step 6: Configure User AccessCopied!
-
After creating the SAML app, turn ON the status for all organizational units
That's it! Your Google SAML configuration is complete.